Installing a beautiful suspended ceiling is surprisingly easy with the right tools and a little know-how. Whether you are renovating an office or upgrading a residential space, the T Grid System (also known as the T-bar system) provides a durable, easy-to-install, and aesthetically pleasing framework for ceiling tiles.
Here is a comprehensive breakdown of the T grid system components and a step-by-step installation guide to ensure a perfect finish.
Core Components of a T Grid System
Before starting the installation, it is essential to understand the primary components of the grid structure:
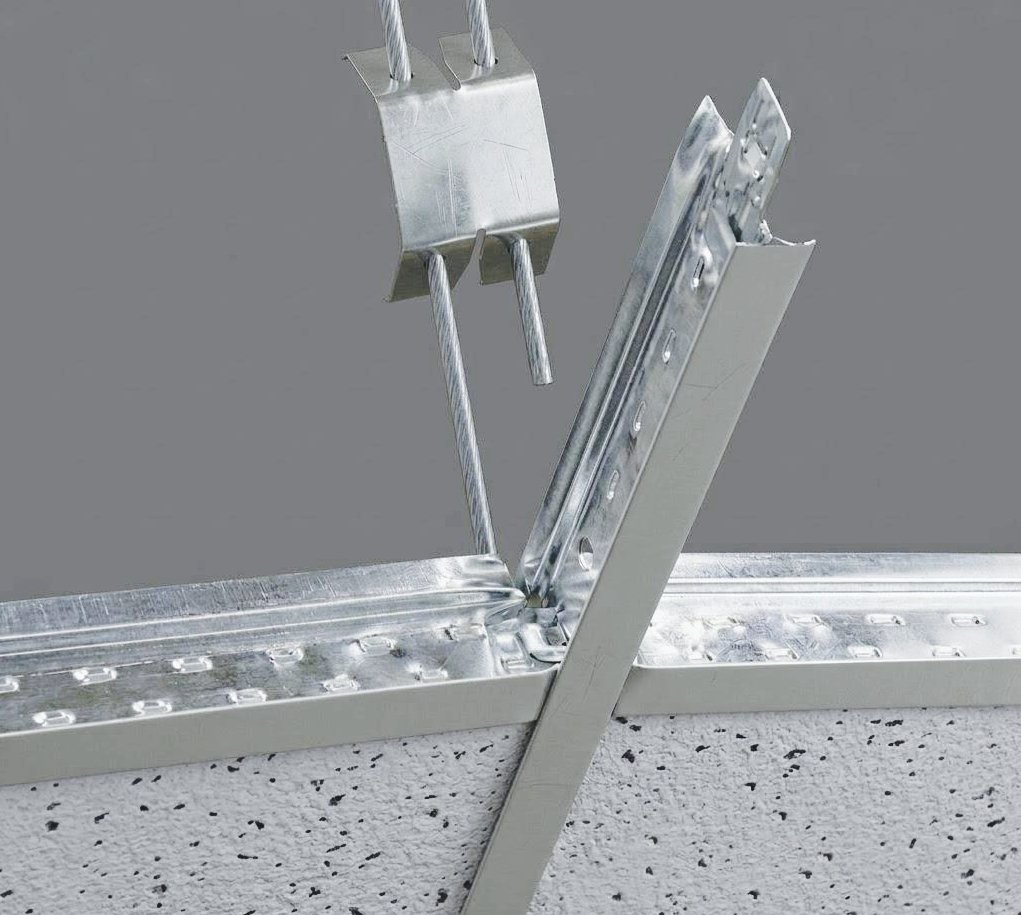
- Hanger Wire / Hanger Rod: Fixed to the original ceiling joists and drops down to provide overall load-bearing support.
- Adjustable Clip: Connects to the hanger rod to allow for precise height adjustments and leveling of the grid.
- Main Tee: Suspended by hanger wires, this is the primary structural support and load-bearing skeleton of the ceiling.
- Cross Tee: Cross beams that intersect perpendicular to the main tees, completing the grid modules to hold the panels.
- Wall Angle: L-shaped metal profiles attached to the perimeter walls to support the edge tees and ceiling panels.
Step-by-Step Installation Guide
Step 1: Planning and Layout
- Measure your room and draw the layout to scale on graph paper.
- Draw a center line perpendicular to the room joists at the midpoint of two parallel walls. This represents your center Main Tee.
- Mark parallel lines for the remaining main tees at 4-foot intervals. Pro Tip: If the main tees closest to the wall leave a border panel measuring less than 12 inches, adjust the center line by 1 foot in either direction and start your layout again for a balanced look.
- Establish the center line for your Cross Tees. For 2×4 panels, mark cross tees at 4-foot intervals on center. For 2×2 panels, simply divide each 2×4 module with 2-foot long cross tees.
Step 2: Wall Angle Installation
- Determine your desired ceiling height, ensuring a minimum clearance of 4 inches below the lowest air duct, pipe, or obstruction.
- Mark a perimeter chalk line 3/4 of an inch above your desired ceiling height.
- Use a level to check your chalk line, then align the top of your Wall Angles with the line and attach them to the wall. Space your screws every 2 feet or closer.
- For inside corners, overlap the wall angles straight; for outside corners, miter them at a 45-degree angle to fit snugly.
Step 3: String Lines & Squaring
- Stretch a string tightly across the room at each main tee location (attached between opposite wall angles).
- Stretch one string perpendicular to the main tees to mark the first row of cross tees.
- Check if your grid is perfectly square (The 3-4-5 Rule): Where the strings intersect, measure 4 ft along the cross tee string and 3 ft along the main tee string. The diagonal distance between these two marks should be exactly 5 ft. If not, adjust your string lines.
Step 4: Installing Hanger Wires & Main Tees
- Install lag screws at 4-foot intervals along the main tee string lines. Attach a hanger wire to each screw by twisting it three times.
- Cut the hanger wire about 6 inches below the string, measure 3/4 of an inch above the string, and bend the wire upwards at a 90-degree angle using pliers.
- Cut the ends of the main tees resting on the wall angles at an angle to allow for wall expansion and compression.
- Thread the hanger wire through the round hanger hole in the main tee. Use a level to ensure the tee is perfectly flat, then bend the wire up and twist it three times within a 3-inch span to secure it.
- Secure the main tees to the wall angle along one wall using rivets.
Step 5: Installing Cross Tees
- Insert the tabs of the cross tees into the slots of the main tees until you hear a “click”. If you make a mistake, they can be pulled apart and reused without damage.
- Where two cross tees intersect in the same main tee slot, always insert the second cross tee to the left of the first one.
- Rivet the cross tees to the wall angle on one wall every 4 feet. Do not rivet the remaining two walls.
Step 6: Cutting and Installing Ceiling Panels
- If your ceiling panels have arrows printed on the back, ensure all arrows point in the same direction during installation.
- For perimeter panels, carefully measure the opening between the wall and the grid leg, then cut the panel face-up on a flat surface using a straight edge and a sharp utility knife.
- For lighting or vents: Position the fixture location on the panel, mark the perimeter, and cut out the marked area. Alternatively, drop-in lighting panels (like fluorescent lights) can be placed directly into the grid in place of ceiling tiles